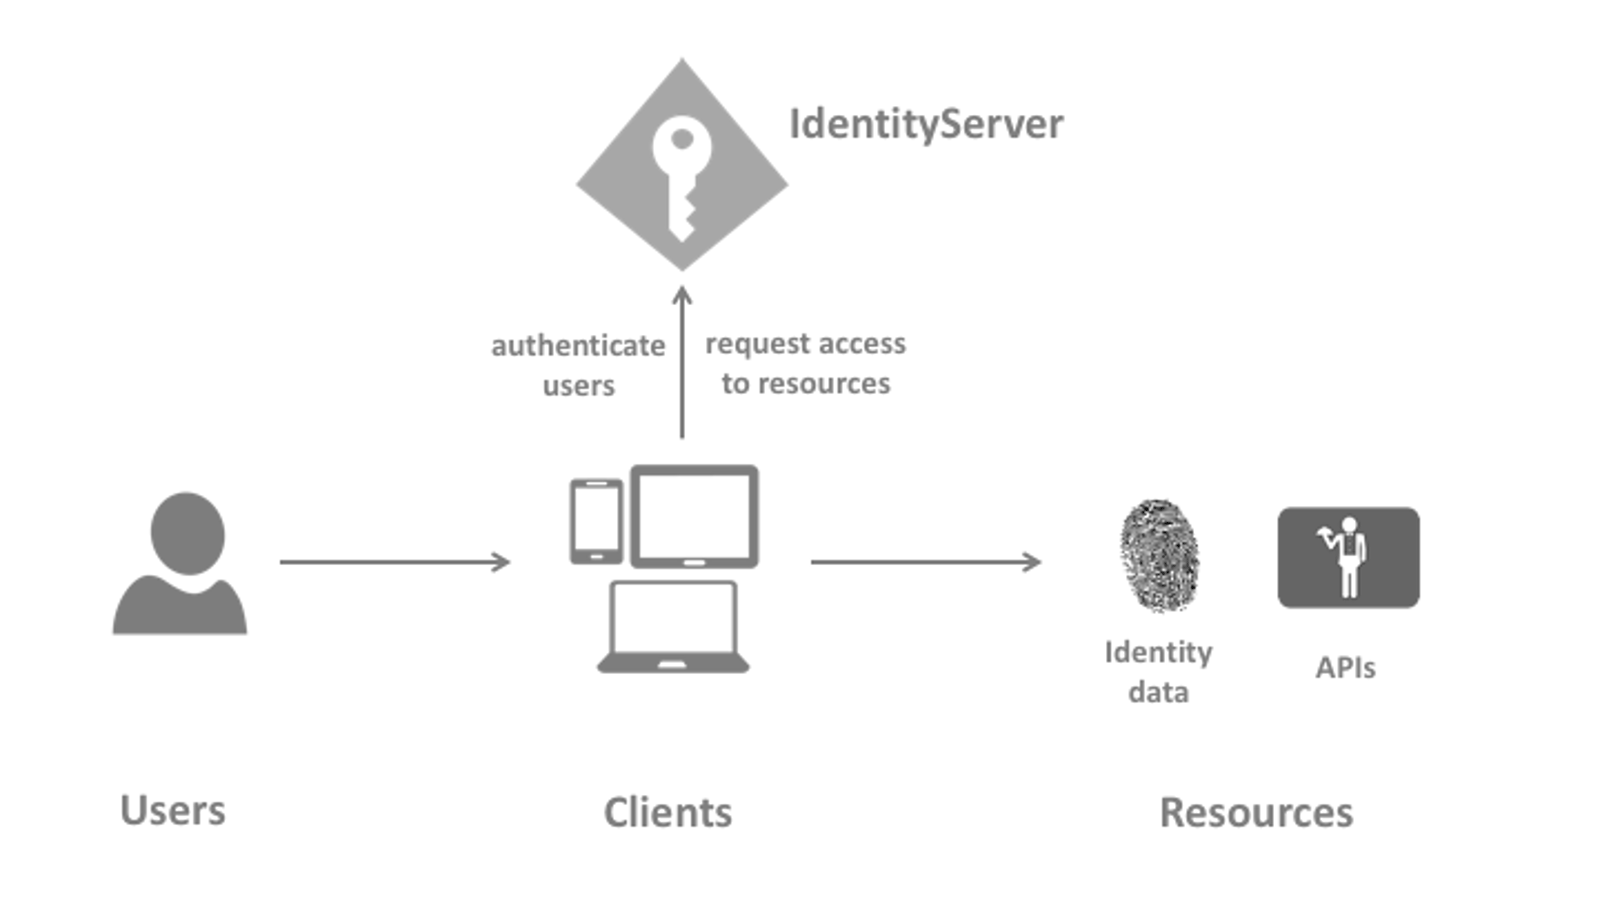
IdentityServer is an authentication server that implements OpenID Connect (OIDC) and OAuth 2.0 standards for ASP.NET Core.
OpenID Connect OIDC – OpenID Connect (OIDC) is an open authentication protocol that profiles and extends OAuth 2.0 to add an identity layer. OIDC allows clients to confirm an end user’s identity using authentication by an authorization server.
OAuth 2.0 – OAuth 2.0 is an authorization framework that delegates user authentication to the service provider that hosts the user account, and authorizes third-party applications to access the user account. OAuth 2.0 provides authorization flows for web applications, desktop applications and mobile devices.
Implementing OIDC on top of OAuth 2.0 creates a single framework that promises to secure APIs in a single, cohesive architecture.
How does OpenID Connect Work
OpenID Connect starts with an OAuth flow with included OpenID Connect scope from the client that asks a user to authorize a given request. After the request has been processed, an access token and an ID will be generated by authorization server that contains claims which carry information about the user. From here now the client can send a request to an endpoint on the authorization server known as UserInfo endpoint to receive remaining claims about the user.
How does OAuth 2.0 Work
OAuth 2.0 works by introducing an authorization layer which separates the role of the client from the resource owner, in that whenever a client requests access to resources on a server which are controlled by an end user, the client won’t be needed to send his/her credentials instead the client will be provided with an access token which is approved by the end user and use the access token to get the needed resources. OAuth 2.0 is designed to support a variety of different client types that are accessing REST APIs.
Roles in OAuth 2.0
OAuth defines four roles:
- resource owner – An entity capable of granting access to a protected resource. When the resource owner is a person, it is referred to as an end-user.
- resource server – The server hosting the protected resources, capable of accepting and responding to protected resource requests using access tokens.
- client – An application making protected resource requests on behalf of the resource owner and with its authorization. The term “client” does not imply any particular implementation characteristics (e.g., whether the application executes on a server, a desktop, or other devices).
- authorization server – The server issuing access tokens to the client after successfully authenticating the resource owner and obtaining authorization.
Example: Let’s assume you have a service or platform that sells commodities e.g clothes. Whenever a user registers to use your platform you might want to send a promotional message to his/her email contacts letting them know of your platform. But now here comes the twist, the user can’t trust you or your platform to give you his/her email credentials so that you log in into his account and get his/her contacts and send them the message. Instead you can choose to go with OAuth 2.0 in that you can ask the user to log in into his/her account then request for an access token and send that to you so that you can use the access token to get his/her emails.
Key Points
- OpenID is an authentication protocol while OAuth is an authorization framework
- OpenID and OAuth are both open standards that complement each other, but OpenID allows users to be authenticated by relying parties.
- OAuth allows access tokens to be issued to third-party clients by an authorization server.
- OpenID Connect is built on a profile of OAuth and provides additional capabilities in conveying the identity of the user using the application
- Clients use OAuth to request access to an API on a user’s behalf, but nothing in the OAuth protocol tells the client user information.
- OpenID Connect enables a client to access additional information about a user, such as the user’s real name, email address, birth date or other profile information.
- An OIDC relying party is an OAuth 2.0 Client application that requires user authentication and claims from an OIDC provider.
OAuth2 and OpenID Endpoints and Flows
Below are some of the endpoints we will find ourselves using most of the time
/authorize– a client uses this endpoint (Authorization endpoint) to obtain authorization from the resource owner. We can use different flows to obtain authorization and gain access to the API/token– a client uses this endpoint to exchange an authorization grant for an access token. This endpoint is used for the token refresh actions as well/revocation– this endpoint enables the token revocation action. OpenID Connect allows us to do some additional things with different endpoints:/userinfo– retrieves profile information about the end-user/checksession– checks the session of the current user/endsession– ends the session for the current user
Implementing Identity Server on ASP.NET Core and .NET Core
We will start by creating an empty web application and we do that in visual studio 2019, then after that we can install Identity Server 4 package. You can use: dotnet add package IdentityServer4
Next we need to register our dependencies and we do this in Startup.cs file.
In ConfigureServices section we need to add the following, which are the minimum requirements for Identity Server 4.
1 2 3 4 |
services.AddIdentityServer() .AddInMemoryClients(Config.Clients) .AddInMemoryApiScopes(Config.ApiScopes) .AddDeveloperSigningCredential(); |
services.AddIdentityServer, is for registering IdentityServer in your Dependency Injection container.
.AddInMemoryClients(Config.Clients) – passing in credentials which we will use for authentication, We will set this shortly.
.AddInMemoryApiScopes(Config.ApiScopes) – here we will add api scopes that will be used, we will also set this shortly.
We can use a demo signing certificate with .AddDeveloperSigningCredential()
We also the update Configure method as so that we can wire up the pipeline in our project:
1 2 3 4 5 6 7 8 9 10 |
public void Configure(IApplicationBuilder app, IWebHostEnvironment env) { if (env.IsDevelopment()) { app.UseDeveloperExceptionPage(); } app.UseIdentityServer(); ..... |
UseIdentityServer allows IdentityServer to start handling routing for OAuth and OpenID Connect endpoints, such as the authorization and token endpoints.
Defining API Scope and Client
To define our API Scope we will create a new file called Config.cs and we will add the following:
1 2 3 4 5 6 7 8 9 10 11 12 13 14 15 16 17 18 19 20 21 22 23 24 25 26 27 28 29 |
public static class Config { public static IEnumerable<ApiScope> ApiScopes => new List<ApiScope> { new ApiScope("api", "Test API") }; public static IEnumerable<Client> Clients => new List<Client> { new Client { ClientId = "client", // no interactive user, use the clientid/secret for authentication AllowedGrantTypes = GrantTypes.ClientCredentials, // secret for authentication ClientSecrets = { new Secret("secret".Sha256()) }, // scopes that client has access to AllowedScopes = { "api" } } }; } |
With this setup, you can actually run IdentityServer already. It might have no UI, not support any scopes, and have no users, but you can already start using it! Check out the OpenID Connect discovery document at /.well-known/openid-configuration.
Testing Identity Server
Once we start our application we will see a window to show that identity server has started 
Next we can navigate to /.well-known/openid-configuration.
Looking at the discovery document in the scopes_supported we can see api has been added since we defined that in our scopes.
Now we can try to retrieve a token from our authorization server. We will use postman to do our tests.
In the above window:
1 – We select OAuth2.0, since we are performing an authorization
2 – We pass the Grant Type as Client Credentials since we are passing client credentials.
3 – We pass our endpoint to fetch the token, /connect/token
4 – We pass our client Id as defined in our Clients Class in Config.cs, in our case we used client
5 – We pass our client secret as defined in Clients class too in Config.cs
6 – We pass our scope which in our case is api
7 – We can now click on Get New Access Token button and it should return an access token
You can check the identity server console windows and check for responses, if the token generation was a success, it will show window like below:
You can try testing with an invalid client id or client secret and note what responses you will get.
Using Identity Server UI
To use User Interface in Identity Server so that we can get functionalities such as login screens and such we need to installing the UI that Identity Server offers.
We will start by opening powershell and navigating to where we have our identity server project stored and run iex ((New-Object System.Net.WebClient).DownloadString('https://raw.githubusercontent.com/IdentityServer/IdentityServer4.Quickstart.UI/main/getmain.ps1')) This will download files needed and three folders will be added i.e Quickstart, Views and wwwroot.
We will now go ahead and modify the Configure method in the Startup class.
1 2 3 4 5 6 7 8 9 10 11 12 13 14 15 16 17 |
public void Configure(IApplicationBuilder app, IWebHostEnvironment env) { if (env.IsDevelopment()) { app.UseDeveloperExceptionPage(); } app.UseStaticFiles(); // Add this line app.UseRouting(); // Add this line app.UseIdentityServer(); app.UseAuthorization(); // Add this line app.UseEndpoints(endpoints => { endpoints.MapDefaultControllerRoute(); }); // Add this } |
UseStaticFiles() method enables serving static files from wwwroot folder.
UseRouting(), UseAuthorization() and UseEndpoints() we are adding routing and authorization to the pipeline and configuring endpoints to use default endpoint.
Next we also need to modify ConfigureServices method as:
1 2 3 4 5 6 7 8 9 |
public void ConfigureServices(IServiceCollection services) { services.AddIdentityServer() .AddInMemoryIdentityResources(InMemoryConfig.GetIdentityResources()) .AddTestUsers(InMemoryConfig.GetUsers()) .AddInMemoryClients(InMemoryConfig.GetClients()) .AddDeveloperSigningCredential(); services.AddControllersWithViews(); } |
From here we can now test our UI and see if we get something. Start Identity Server and you will see a welcome page. Go ahead and click on on the second link Click here to see the claims for your current session and you will be redirected to a login screen. You can proceed and log in, I will use alice as username and alice as password as these come by default. Once logged in you will see your claims and properties.
You can go ahead and try the second link too Click here to manage your stored grants and here you will see your permissions
That’s all, you have successfully managed to set up your identity server 4 and also added the UI to it.


